Monday, February 29, 2016

February Inspiration by Dawn

Hi everyone, it’s Dawn here (again!) on this fabulous Monday and I have a fun and easy little project to share using Cute As A Button digital image Cinder. I made a Double Accordian Gate fold card.


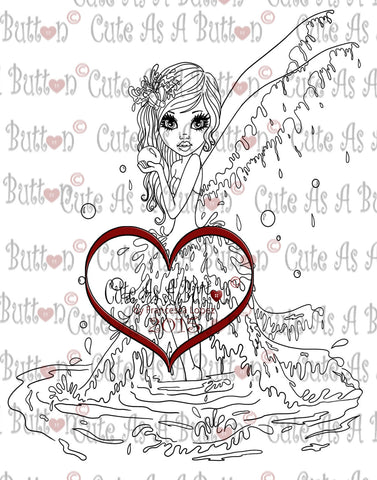
When I color all those pretty Cute As A Button stamps I like to keep a record of the Copic colors I used – that way it is easier to keep track of my color choices for future use.


Copics used:
Skin - E11, E00, E000, R20
Hair - E27, E25, E23, E21
Clothes  - G19, G16, G12, Y15, Y13, Y11
Shoes - C6, C4, C2, C1
Duster - W5, W1, RV19 
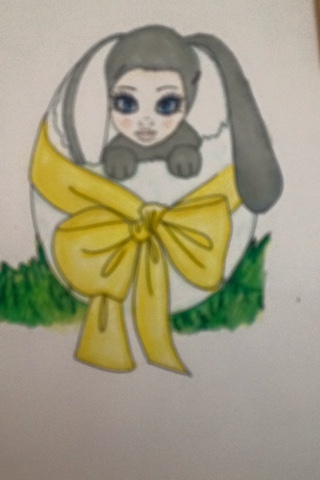
Directions on how to make the card
 
 
First you need to color your image. Here's the completed colored image:


 Next, Using a die, cut out your image:


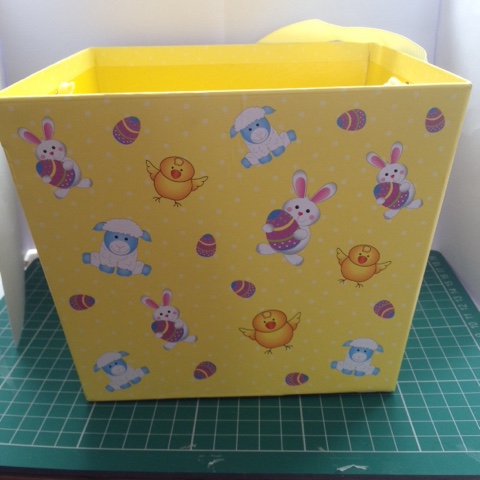
 Next you want to cut out your mat for behind the image. Using a slightly larger die, cut out your mat:


To create the card base: Cut a piece of cardstock to 6x12.


 Score CS at 2, 4, 8, 10
Fold on score lines:
Cut pieces of Cardstock to decorate your card base. You will want to cut 1 piece of green cardstock to 3 7/8 x 5 7/8. Then you will want to cut 4 pieces of green cardstock to 1 7/8 x 5 7/8 and 4 pieces of yellow cardstock to 1 3/4 x 5 3/4. Cut another yellow cardstock at 3 3/4 x 5 3/4, this will be for the inside of the card.
Here is all your pieces for your card:

 Lay out your pieces so you can see what the finished card is going to look like. If you like the way it looks, then assemble your card.

 Here's the finished card:


 Do you love to create using Cute As A Button images? If so, we would love to see them, and to make sure we do not miss a single Button creation from you!
Remember to hashtag us on Instagram with ‪#‎cuteasabuttonstamps‬ so we can find you easily and ogle your awesome creations! Don't forget to check out our BLOG for more inspiration using Cute As A Button images.


Friday, February 26, 2016

February Inspiration by Judy

Hello all!
It's Judy here with my inspiration post for February.

I love this stamp and just had to use it!

Tea Time

Normally I start a project by choosing the papers first.
This time I knew I wanted to use purples as
my color scheme so I colored the image first with
Spectrum Noir pencils and Fiskars gel pens before fussy cutting.


Then I collected all the papers and other elements I thought
would work well with the image.


Next, I prepared the card base.


The rectangle panels were put together next.


I adhered the panels, ribbon and a doily to the base.


Then came the finishing touches.


I hope you'll check out all the fabulous digital stamps available at

Then stop by the
and check out more inspiration from the DT
and join in the challenge.
And don't forget to show us what you create with 
Cute As A Button images at our Facebook Group.

Until next time,
Happy Crafting!

Wednesday, February 24, 2016

February inspiration Post

Water Fairy

IMG00175 Water Fairy Digital Digi Stamp
I love this image. Isn't she cute , she is from Cute as a Button , you can grab her here.
 http://cute-as-a-button-stamps.myshopify.com/collections/fantasy


I coloured her using my Prismacolour pencils.  I placed glossy accents on some of the water bubbles.
I cut some blue bazzil card stock 28 cm x 13.5cm. Folded in half.
Then I glued down a white paper dollie. Cut 12 x 11 cm, of light blue bling bazil card.Placed this down using tape leaving a 1.5cm gap.  I cut the image out to be 11.5 x 10.5 cm. I used the We Are Memory keepers sew easy tool to edge the image with a straight stitch, (you can use a sewing machine instead). Then I placed image on top of bling card using double sided tape. Then to finish of the card I placed small dots of glossy accents on each corner.

I stamped the sentiment using a Kasazz Stamp , onto the blue bling bazil paper with Brilliance  ink pad Platinum , then cut out around the circle . ( I dont have a big enough punch or a circle die smaller enough).
 I used the  Spellbinder shapeabilities Parisian Motifs die on dark blue bazil card stock and taped , stamped image to this and placed this onto the left side of my card.

I placed 2nd prize for this card at my local show.  Its so gratifying to be reconised in your local community for your work .  whoop whoop. lol.

Monday, February 22, 2016

Inspiration post February - Christine


For my inspiration post this month I decided to do an Easter themed make as Easter is early this year.
First off I printed out my image after resizing it. I then got out my Spectrum noir markers and started to colour I used my pencils to add some extra depth 
I then fussy cut the image out. I got the basket I'm using for my project from our local pound shop. 
As you can see I have bunnies and eggs all over it I changed the ribbon handle as it was very long.
I then added a heart shaped doily and
sealed with pva and water at a 2:1 ratio . I then added a bow made from the original ribbon handle.
I love how it turned out I will be filling it with prizes for an Easter egg hunt.
I just popped some polystyrene balls in to show you all it has loads of room. 

Saturday, February 20, 2016

February inspiration by Nicky


Here is my inspiration for you today. Its a fun project. I hope you all like it :)


 I made this card using the 'New Beats' image from Cute As A Button. Find it at the shop link below.


Here are some step by step instructions of how I made the card.

First I chose some paper and card that matched the theme of the image, then coloured the image to match the colours on the card/paper.


I used the following Promarkers:

Clothes and shoes- Amber and Honeycomb.
Skin - Dusky Pink, Blush and Sunkissed Pink.
Shadow - Warm Grey 1.
Pillow - Ivory and Vanilla.
Lips - Sunkissed Pink.
Eyes - Pastel Blue.
Headphones - Cool Grey 4.
Poster - Canary and Warme Grey 1.
Phone - Warm Grey 2 and Canary.
Hair - Sandstone and Cinnamon.


Next I Chose a 6.5" x 5" white card blank, cut the large plain orange card to 16.6cm and the patterned paper to 16cm. I cut the image to an appropriate size to allow a small amount of white all arounfd the image. I chose some embelishments to go with the colours and the image. As the poster says Jewels i chose mainly gems to fit the saying.


Then I put all the pieces together to check the layout of how I wanted the card to look. When I was happy with the layout I stuck it all down. 


I stuck the patterned paper to the orange card with plain double sided tape, wrapped the ribbon around the whole lot, then mouned it to the card blank with plain doublesided tape. I added the image with foam tape. I added gems to all 4 corners of the image and all 4 corners of the patterned paper. I also added gems at both ends of the ribbon.


Here are some links for you:


Thanks for reading and 
x HAPPY CRAFTING EVERYONE x


Monday, February 15, 2016

February Inspiration by Lau

Hello !

It's Lau ! I want to share a Bookmark Corner with you today. I made it with the digital stamp "Back To School" you can find in the store HERE
Hope you like it ! xx


........................


Bazzill Paper for the square, JoyCrafts Papers for the decoration


I cut a square 10 cm x 10 cm (4 pouces)
and making marks at 5 cm (2 pouces), these both lines will be folded.


The front


I made a border (optional) with a border punch (Fiskars)


This is the back of the bookmark, I adhere a second triangle over the flaps. This will keep the bookmark closed.


To decorate the front, i used a JoyCrafts Paper, and i use Distress Ink for all edges


I colored the image with Promarkers and cut it with round dies Sizzix


Et voilà !!!


I hope I have inspired you. Feel free to join us on Facebook to share your projects, it's here : https://www.facebook.com/groups/CuteAsAButtonDigiStamps/

The shop is here : http://cute-as-a-button-stamps.myshopify.com/

and the blog is here : http://cuteasabuttonchallenge.blogspot.co.uk/

Have a great day dear Crafters ! xx

Thursday, February 11, 2016

February Inspiration by Margaret

It is my turn to do the inspiration post for Cute as a Button today.
I have made a very simple card which will be easy for beginners
I have used the lovely precoloured digi stamp IMG00057 Button Love
You can also buy this digi stamp as a black and white stamp for you to colour.
I have layered the digi stamp onto button paper and added ribbon.
Added free sentiment from Gingers House blog.

You can buy all the lovely Cute as a button digital stamps and rubber stamps plus other things at
http://cute-as-a-button-stamps.myshopify.com/

and I hope you will go over to the challenge blog and see the lovely work by the design team and join in the challenge.
http://cuteasabuttonchallenge.blogspot.co.uk/

We also invite you to join the facebook group
https://www.facebook.com/groups/CuteAsAButtonDigiStamps/

Have a great day everyone.

Saturday, February 6, 2016

♥ Inspiration project by Valentina ♥

Hello again my crafty friends!!
Here I am today to show you this month inspiration project for you ...
The theme for this month of course is Valentine's day, 
and the shaker card that I have made is for my hubby :)
The image that I have use is:


I have colored my image with my faithful wooden pencils,
prepared some little hearts that I have pull up from my forgotten box, white base cardstock, pattern background paper, some acetate and double sided adihsive stickers for the dimension.


I have prepared some ribbon, punched butterflies, flowers with rhinestone and a small tag.


And here is my final product :) after making a base for the card, I have glued my background paper and on the end I've put double sided adhesive stickers and those little hearts, then I have put acetate and on acetate I glue a ribbon. In every corner I have put embellishments and on the tag I wrote Be mine cause it rimes, I'm yours - Be mine ♥

Come and stop by Cute As A Button store and pick some great images for youre cards,
after you make a card, come and visit us at our Blog challenge
and our Facebook group and show us youre great creations!!!
With lots of hugs have a great and crafty day 

Thursday, February 4, 2016

Autumn Wind


Hello
Fiki here to share with you my inspiration project
 for Cute As A Button Inspiration Showcase 


Hope you like it!


I prepared my card base ,colored image and paper

I use fox stickers

here I distressed edges and little bent them


and here is my finished card


I used on my card digi image"Autumn Wind "
I hope I have inspired you and you will pop to Cute As AButton Stamps shop choose image and make wonderful creations!
If you make any creation with Cute As A Button Stamps images share with as at our
blog challenge and our facebook group.

happy crafting!

See you my friends  !